Liisa's Chocolate Factory presents- "5 healthy, delicious treats"
March 15, 2020
Who doesn't love chocolate?
I mean... there perhaps are some rebels who would be exceptions confirming the rule... but still- cacao seeds, from them chocolate and now all the variations of it, make it one of the most popular sweet treats ever existed on this planet. Even the plant that chocolate is made from- cacao tree (Theobroma cacao) -- means “Food of the Gods" in Greek. See- already people in the very early days had good taste!
Some of the store-bought chocolates these days have often all kinds of extra, unnecessary things in them, so today I'll share 5 of my favourite treats with you. All of these can be made vegan, but don't have to, so you can choose exactly based on your preference.
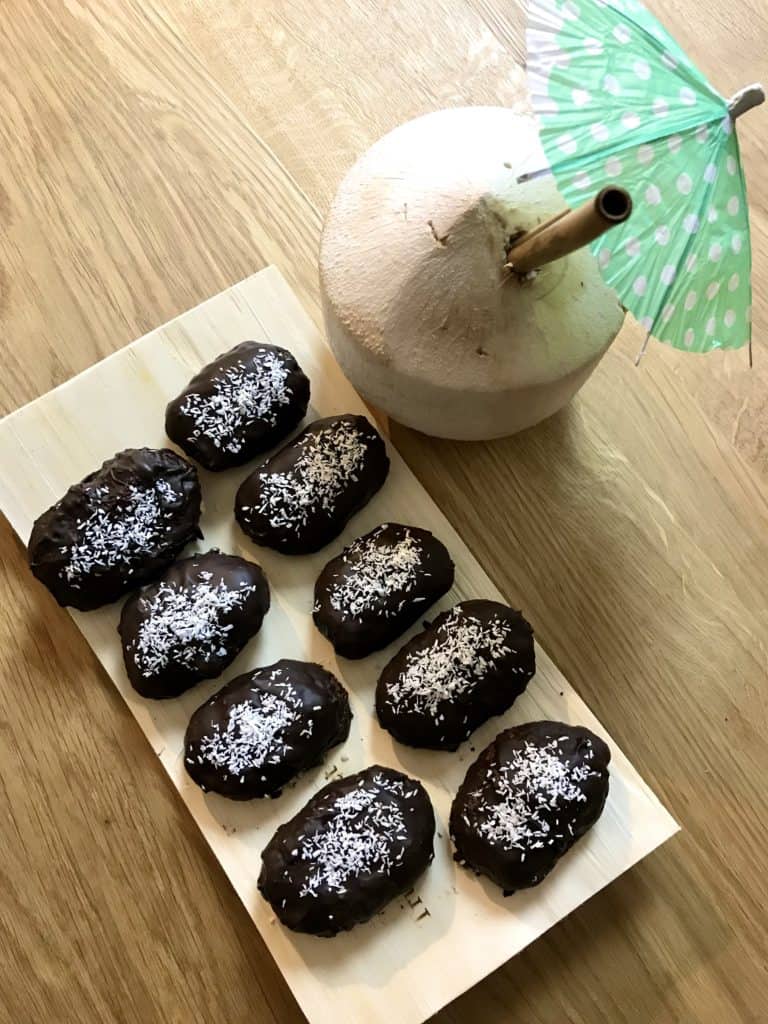
- Bounty
Coconut is one of my most loved flavours, so obviously Bounty has always been at the top of my chocolate bar list.
What you will need:
- 1 cup (100 g) of shredded coconut
- 2,5- 3,5 tbsp maple syrup (or agave or honey)
- 2 tbsp coconut oil
- 1/2 tsp vanilla extract
- A hint of salt
- 150 g chocolate
What to do:
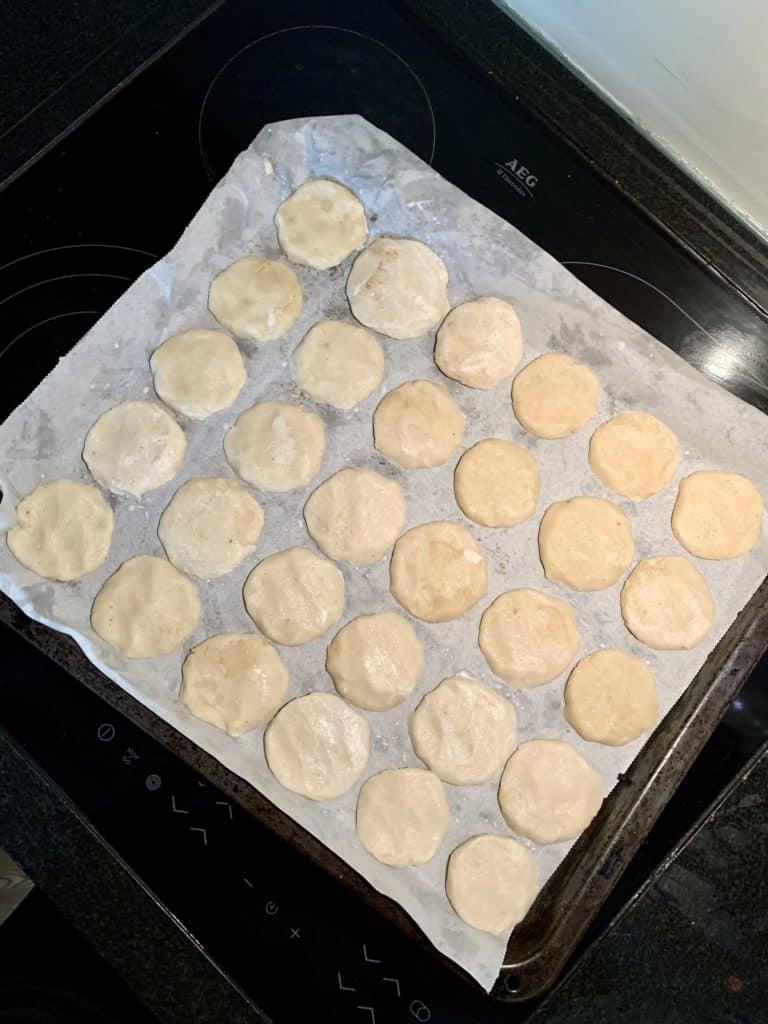
- Blend the coconut flakes, maple syrup, coconut oil, vanilla extract and a hint of salt in a food processor. Put less maple syrup at first and then add based on your desired sweetness. Form the mixture into patties (if too sticky right away, freeze for a little bit and then form).
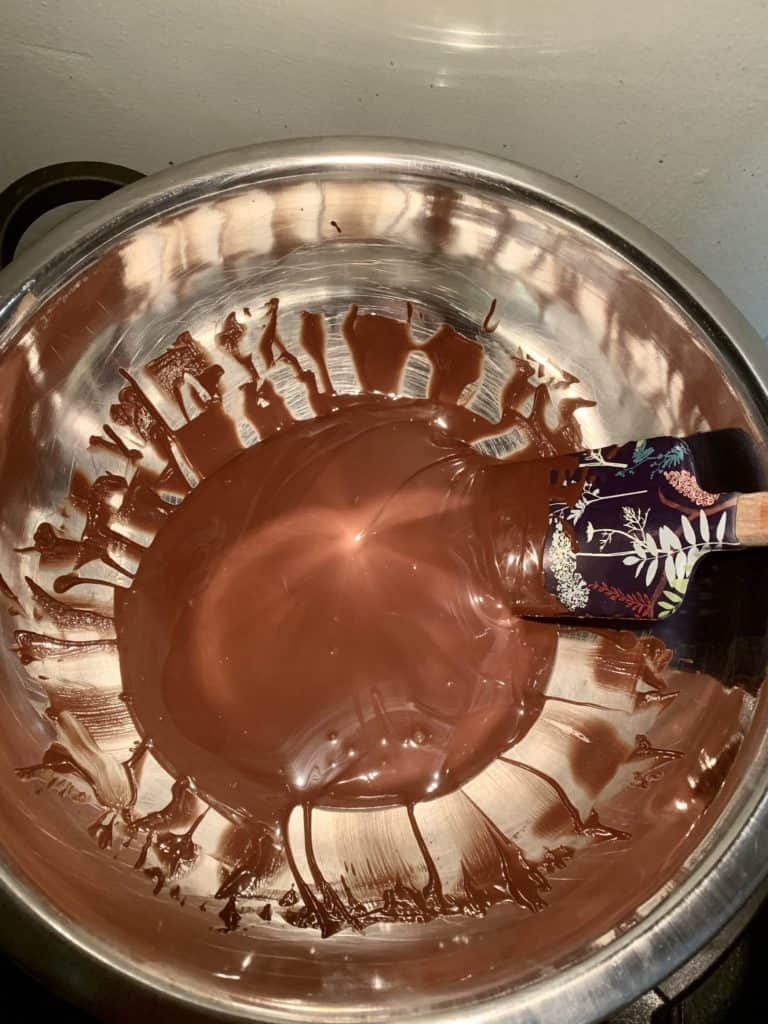
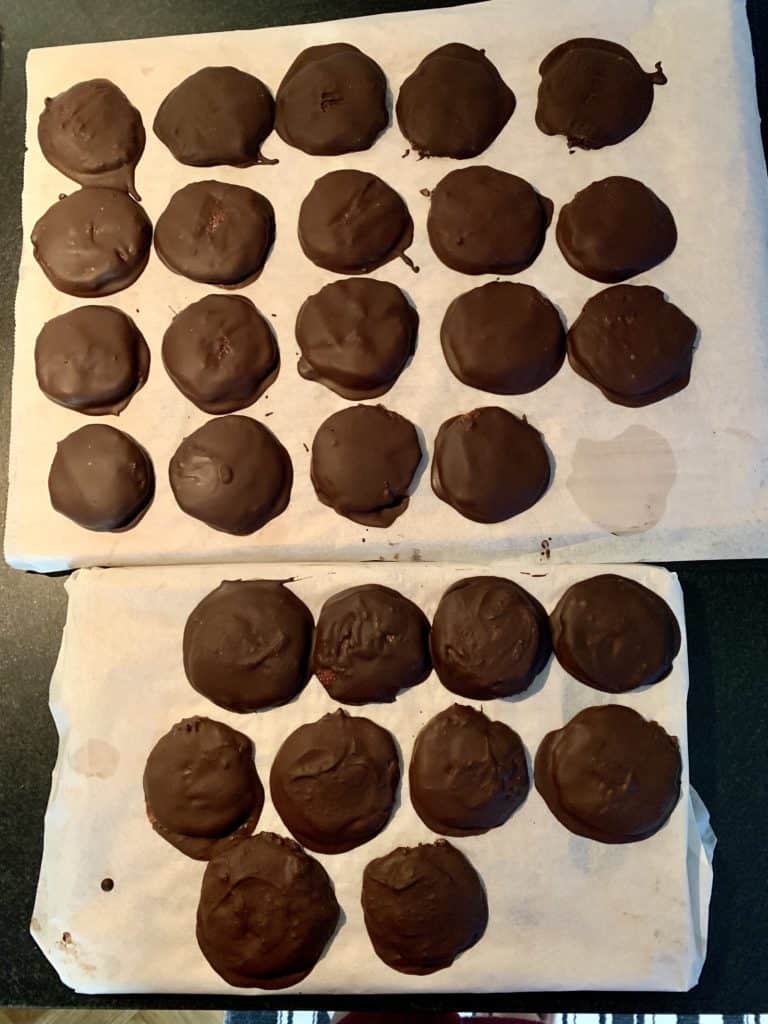
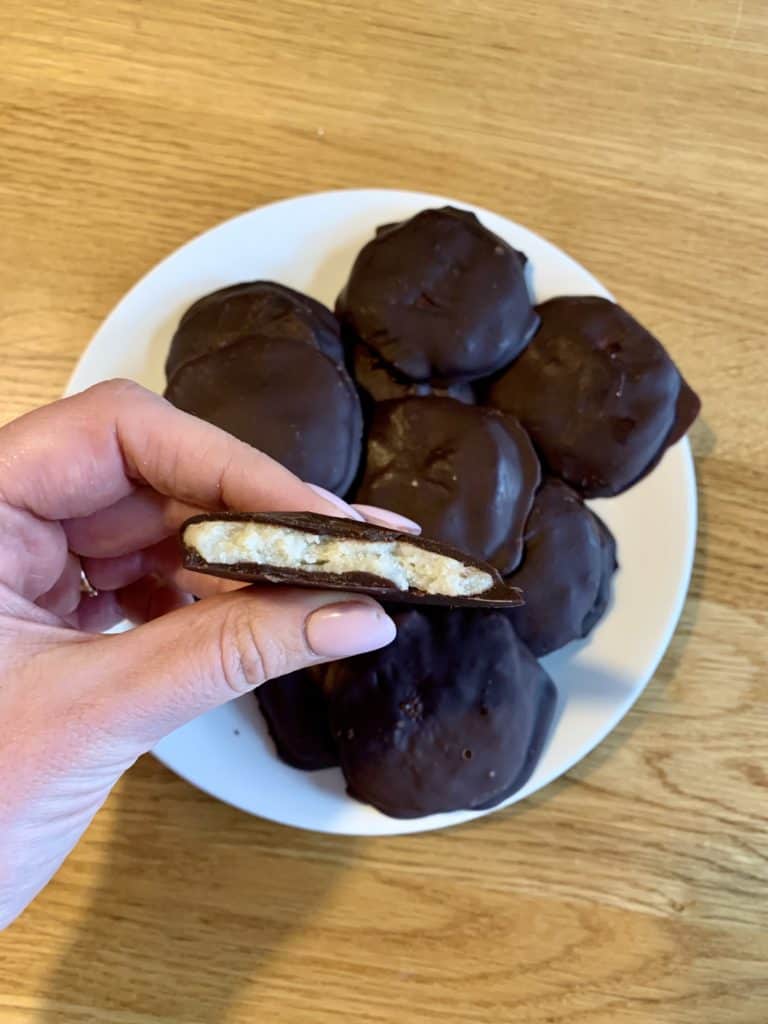
- Melt chocolate on a water bath (you can add a tsp of coconut oil into it to make a smoother sauce). Keep the coconut patties in the fridge meanwhile. Then cover the patties with chocolate and sprinkle some coconut on top.
- Refrigerate and indulge.

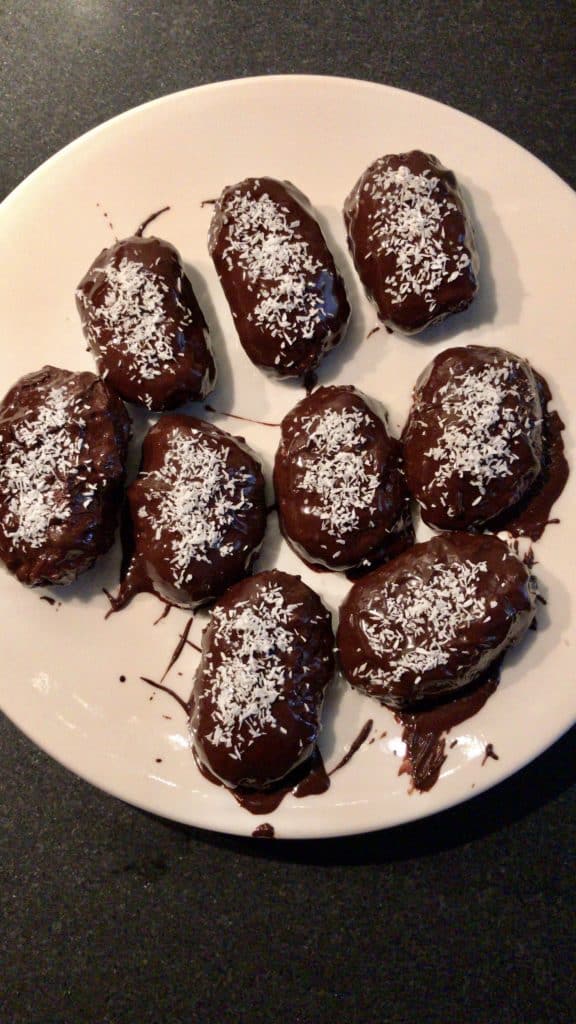
First form the patties from the processed ingredients and then cover with chocolate
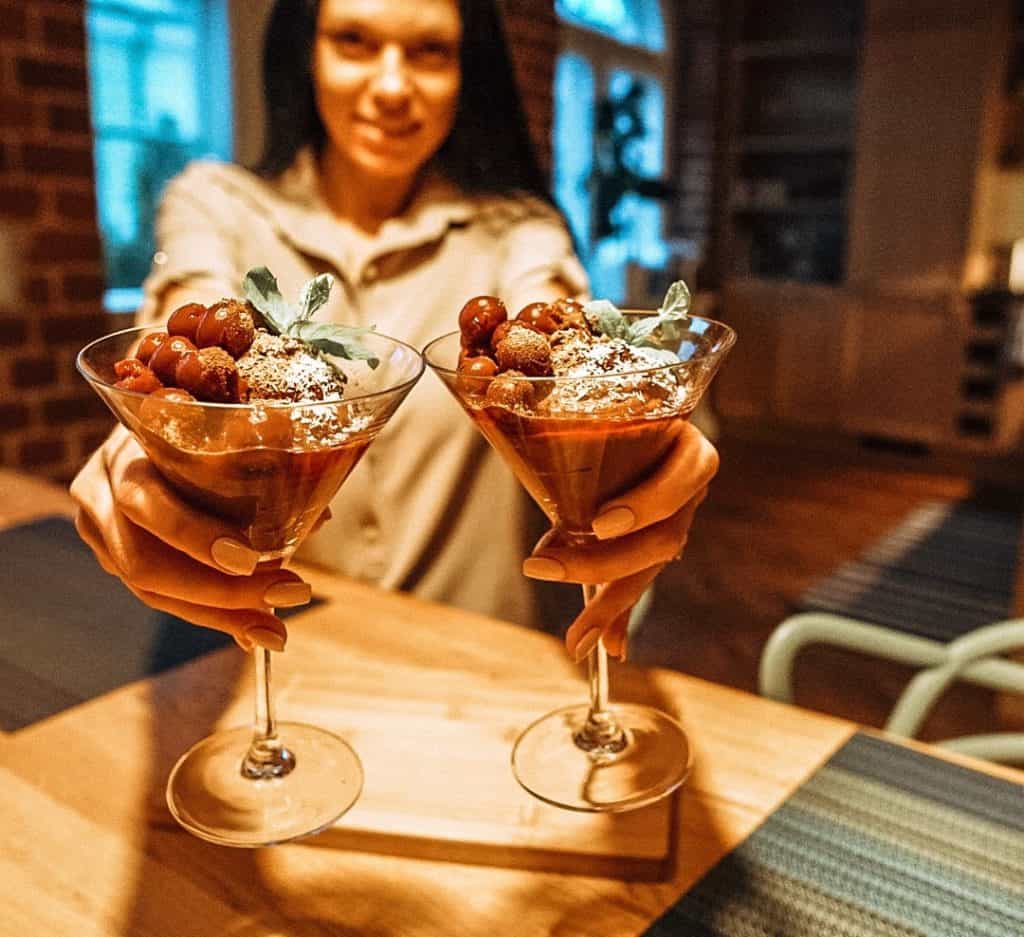
2. Chocolate hummus
This heavenly dessert is so easy to do and so delicious. Literally takes around 5 minutes to assemble from scratch.
What you will need:
- 1 can of chickpeas (you can soak your own too)
- 4 tbsp maple syrup (or any other sweetener)
- 1/2 tsp vanilla extract
- 1/4 tsp salt
- 4 tbsp unsweetened cocoa
- A bit of water (optional for a smoother texture)
What to do:
- In a food processor combine all the ingredients (except water). Puree until the mixture is smooth. Add water based on the desired consistency and maple syrup based on the desired sweetness.
- I like to serve it with peppermint leaves to give some freshness, cherries (with the cherry juice) for some sourness and coconut flakes for some crunch. YUM!
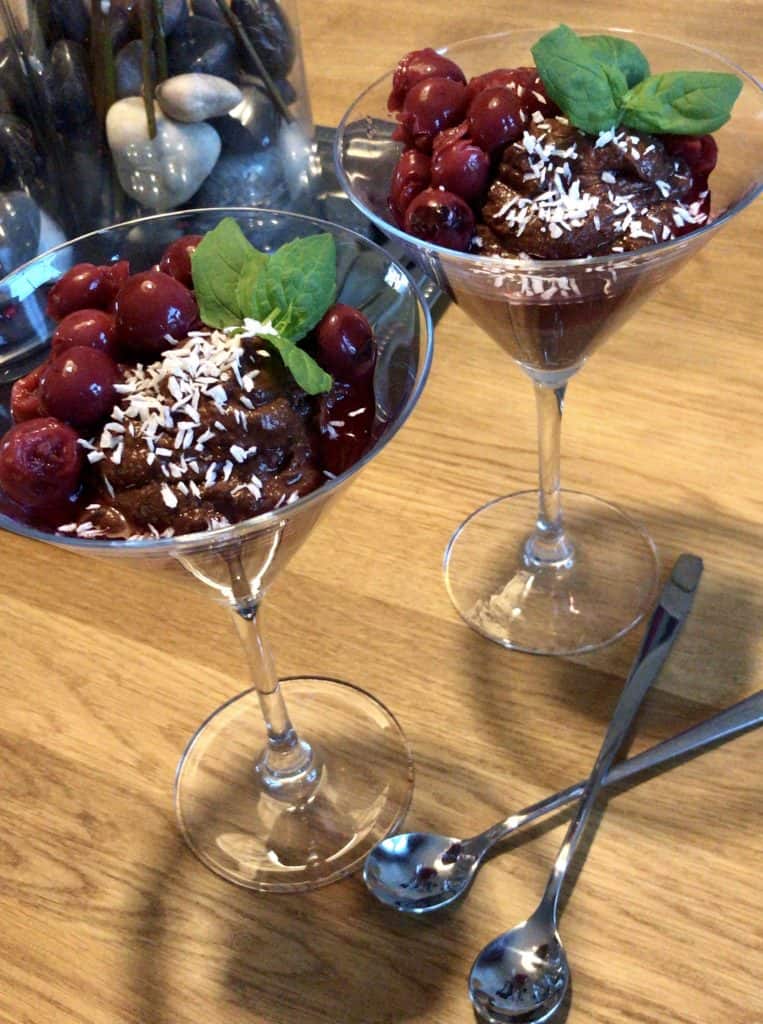
You can also use it on a bread like Nutella or pancakes. Definitely a great substitute for kids instead of store sweet desserts.
It is also a good dip to serve with a fruit platter.
3. Snickers
A classical sweet-and-salty nutty, caramel chocolate bar.

What you will need:
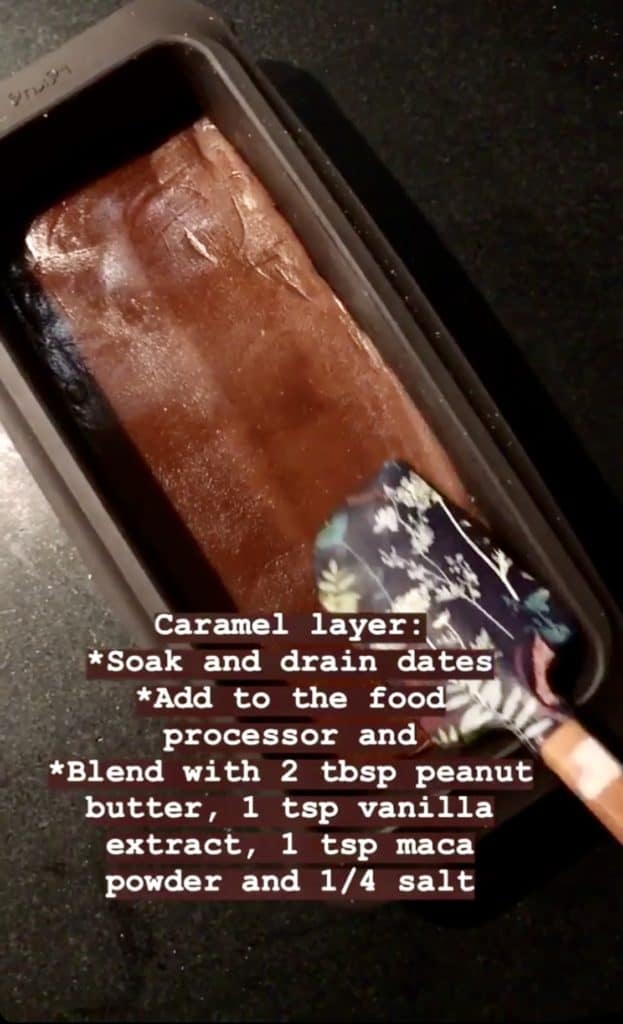
Caramel layer:
- 1 packed cup of dates (around 190 grams)
- 2 tbsp peanut butter
- 1 tsp vanilla extract
- 1 tsp Maca Powder (optional)
- 1/4 tsp salt
Nougat layer:
- Oats processed to 2/3 cup oat flour ( around 90 grams.) If you prefer- choose gluten-free oats.
- 1/4 cup date caramel (above)
Other:
- 1/3 cup (around 50 grams) Salter Peanuts
- 100 grams / 4 oz Chocolate (choose vegan if you prefer)
What to do:
- Process the oats to have oat flour.
- Soak the dates in hot water for 10 minutes. Drain them, add to the food processor and blend with peanut butter, vanilla extract, salt, and optional Maca powder. Process until thick and smooth and caramel-like.
- Remove the date "caramel" from the processor. Add the oat flour with 1/4 cup of date caramel and process.
- Firmly and evenly press the oat flour nougat into a small and narrow container. ( I used a bread baking container).
- Spread the remaining caramel with a spatula over the Nougat and sprinkle salted peanuts over it. Press the peanuts into the layer so they stick.
- Freeze 60-90 min. Remove from the container and cut into bite-sized pieces. Return to the freezer while you melt the chocolate
- Melt the chocolate on a water bath and cover the bars with it. Put into the fridge for another 10 min.


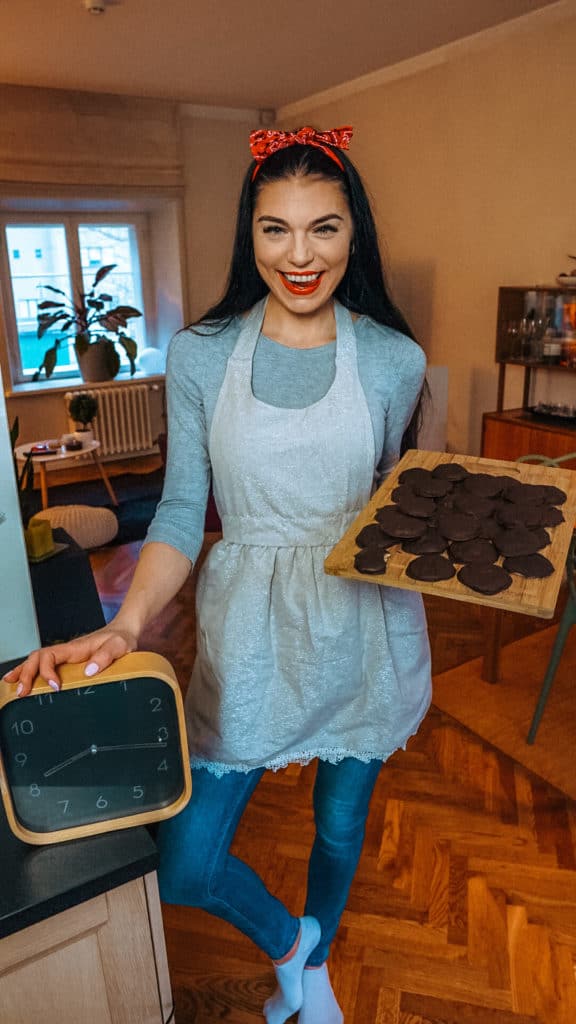
4. Home-made chocolate
The OG itself!
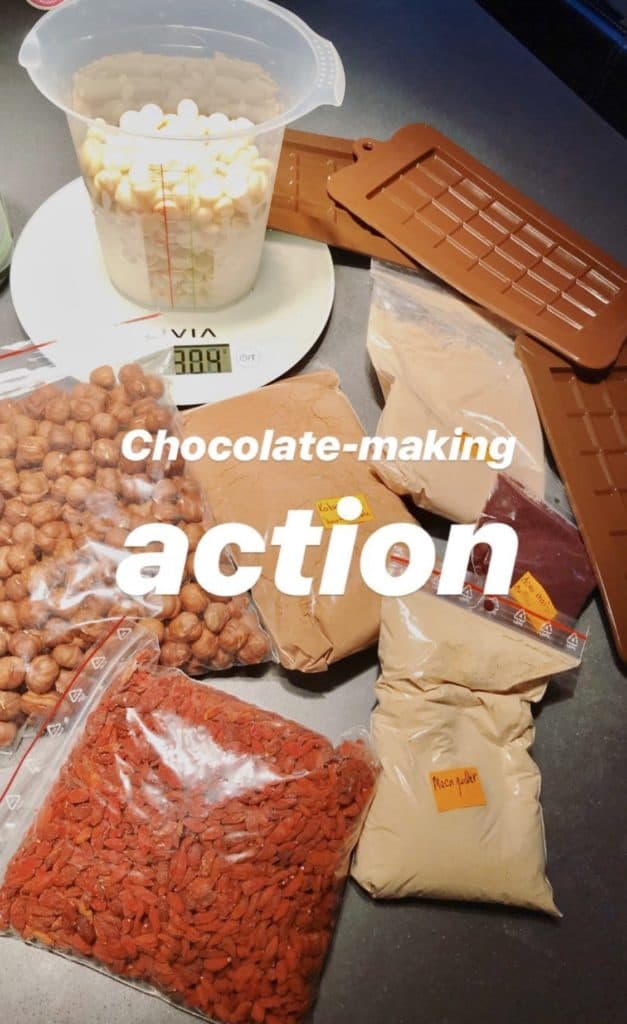
What you will need (main recipe):
- 100g cocoa butter (1 dl when melted)
- 1 tbsp coconut oil
- 4 tbsp cocoa powder (can add more too)
- 3 tbsp agave syrup or liquid honey
Can add also (fancy recipe):
- 2 tbsp lucuma powder
- 1ts maca powder
- ½ tsp vanilla
- Goji berries, coconut flakes, other dried berries, nuts
With this amount, you'll get one chocolate tray. If you want to do more, then just double or triple (or quadruple, sweet-tooths) the amounts.

What to do:
- Melt coconut butter on a water-bath. If you have a solid piece, you might need to grate first for it to melt faster. Don't let any water get into the bowl- it can turn into a clump.
- Add cocoa powder, honey/ agave, coconut oil (if you prefer then also maca and lucuma powder) and stir.
- If you want- add your favourites into the bottom of the tray (goji or other berries, nuts, coconut etc), stir to chocolate again and pour into the mould.
- Place into a freezer for 20 minutes and snack away.


5. After 8 - peppermint chocolate treats
A wonderful balance between the sweetness of chocolate and a kick of the refreshing mint.
What you need:
- 1/2 cup coconut oil, melted
- 2 tbsp coconut flakes
- 1/2 cup raw cashews, soaked for at least 2 hours
- 8-10 drops stevia or any other sweetener, to taste
- 8-10 drops essential peppermint oil/peppermint extract
- 3/4 cup raw chocolate (or any dark chocolate of your choice)
What to do:
- Melt coconut oil.
- Grind coconut flakes to flour (can use ready-made coconut flour too, but then it is not so flavourful). Add the soaked cashews, sweetener and coconut oil. Blend until the mixture is smooth.
- Refrigerate for 30 minutes or so for the dough to be firm.
- Once it is thick enough, shape into patties. Place them in the freezer and start melting your chocolate.
- When the patties are firm dip them into the chocolate and add onto a parchment paper. When you have a lot of them (like I did), then you might need to put the patties back into the refrigerator a couple of times for them to be firm.
- You can keep them in the fridge until one month (which is very unlikely to happen, because they taste SO good!)
Blend the peppermint-coconut-cashew mixture; form into patties; melt chocolate and assemble

The result- Peppermint Patties / After Eights / Junior Mints- however you prefer to call them:)


I wasn't really expecting it, but these turned out to be my favourite ones of all of them. Nick couldn't believe eating them that they were made of cashews:D
Now you can choose your prefered one(s), give it a try and share your feedback with me too.
A chocolaty virtual Sunday hug to you guys.
Love,
Liisa.
Christmas spirit is hand-made
December 15, 2019
I have never been too much of a handy person.
When I was in school I delegated most of my handicraft lesson tasks to my grandma. Then I tried to be super slow in the class so that the teacher wouldn't understand the difference between what I did there and what the end result was. I remember thinking- "I will one day be such a crappy grandmother because I won't know how to do any of this stuff."
Just like cooking, which previously had seemed a waste of time to me, doing hand-made presents fit exactly in the same category. "Why should I take that time, if I can just go and buy something?" was my reasoning. Last year though, after going through everything with my health, for some reason I started appreciating all hand-made things so much more. They have that one extra ingredient, that can't be always added to purchases- LOVE! A whole lot of love.
So I decided to give it a try...
I share it because maybe some of you are on the look for ideas to do this Christmas and this might ease your search a bit.
Bare in mind reading this- it doesn't need a whole lot of talent (which as you discovered above I surely lack) to put together something sweet and handcrafted. Just some time and effort.
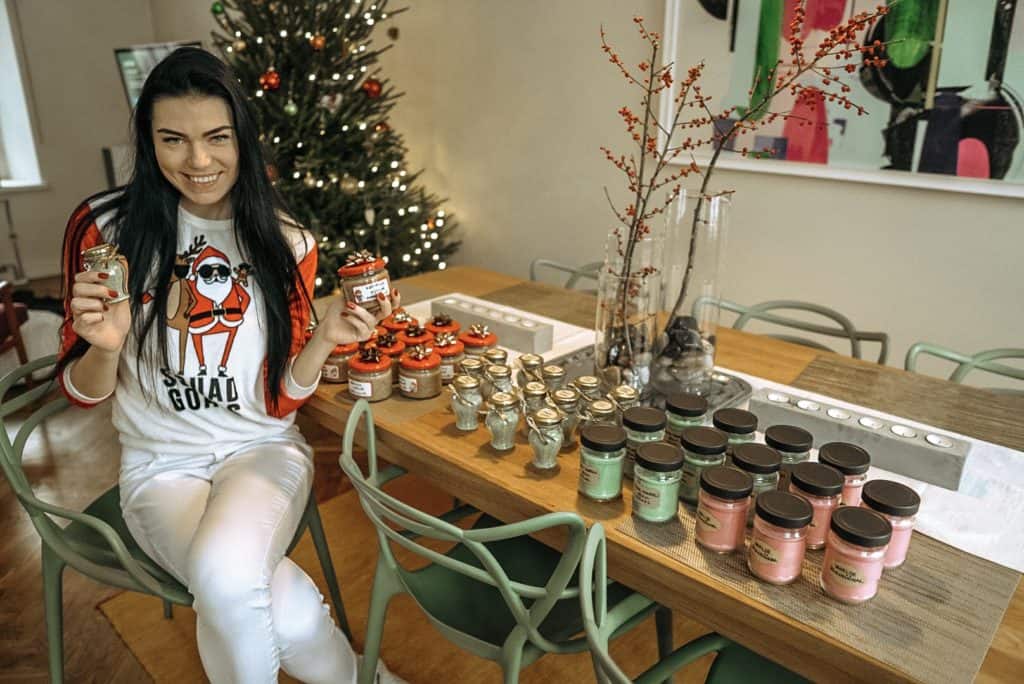
Here's what ended up making into the gift-bags of my friends:
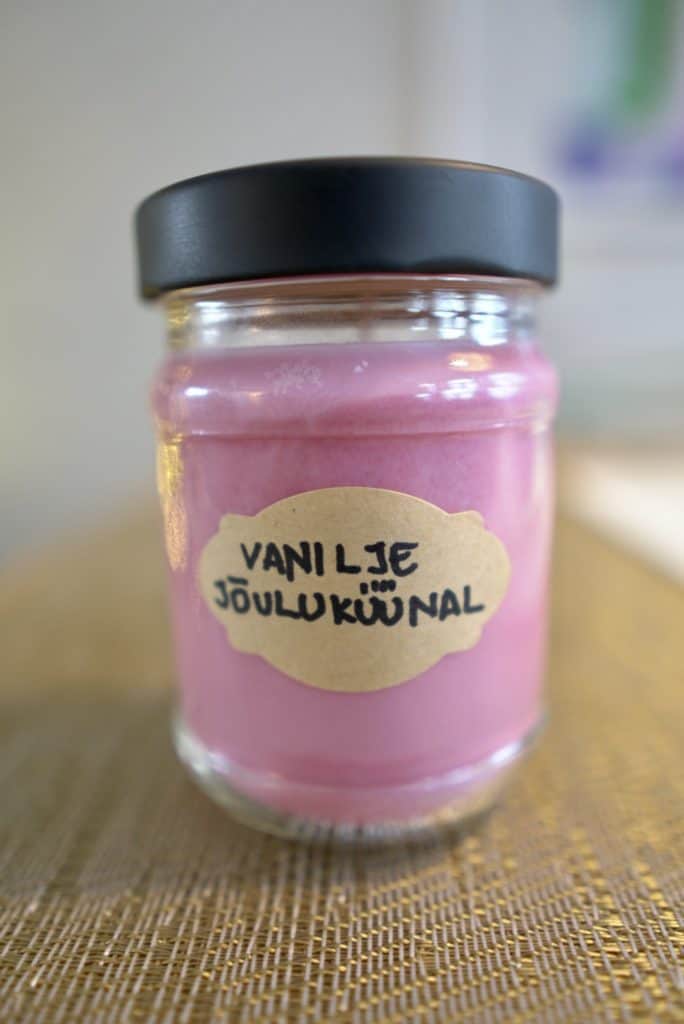
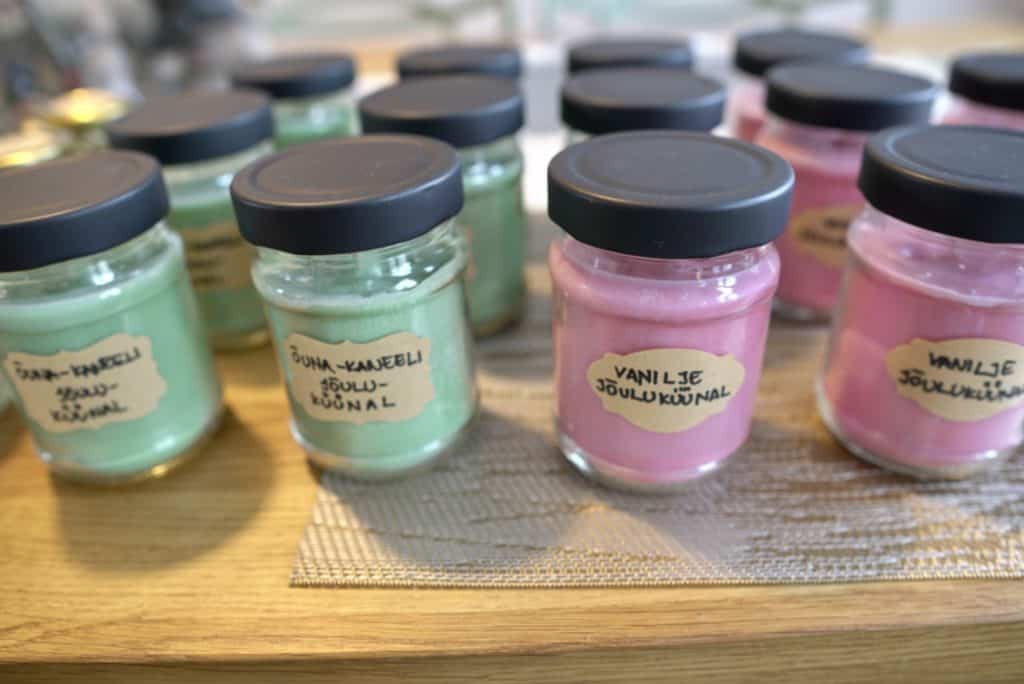
- Soy wax candles

First, melt the preferred amount of soy wax flakes on a water bath. Add in the color tablets and smell drops if you prefer. I chose to do apple-cinnamon green ones and vanilla smelling red ones (which eventually turned out pink).
Let the mixture cool to about 50C / 120F to avoid cracking when drying. Then put the wicks in your jars. For that, I lit another candle and dipped the end in the wax, so it would stay in the place in the middle of the jar.

Pour the liquid mixture in and let it thicken 10+ hours. Since I did two different ones I just divided the mixture at the beginning to two and added the colors to separate patches.

Once cooled I added labels and lids.

I bought all the jars, lids, glasses from Magaziin store, but really whichever containers you prefer, work. They just need to bear the heat. For the Estonians- the candle materials I ordered from hobipunkt.ee. None of this stuff is sponsored, maybe just makes your journey to get the necessary easier.
2. Crunchy peanut butter
First roast ordinary, unsalted peanuts in the oven around 5-8 minutes until you feel the good, roasted nutty smell.
Then blend (I used a food processor) the peanuts for a few minutes until they start becoming a creamier mixture. Add oil based on the preference of creaminess, honey and a hint of sea salt.
Blend until desired texture. For crunchy peanut butter chop some nuts separately and stir in with a spoon. Keep refrigerated.

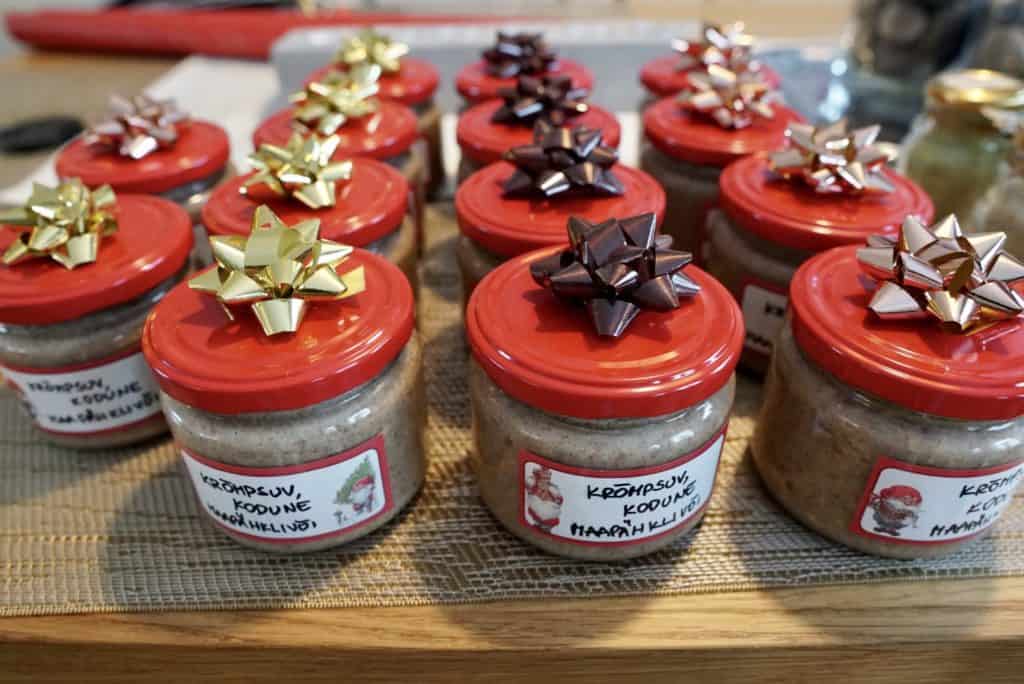
It can be used on porridges, baking, smoothies or I just eat it with a spoon. To me, it tops all store peanut butters.
3. Herb salt
First blend bigger grain sea salt with fresh rosemary, thyme, dill (or whatever your favorite herbs are). Add garlic.
When the mixture is blended, keep in the oven on a low heat for a few minutes to let it dry and get to the texture of salt.


Use on whatever food that needs some extra seasoning.

One last reminder- sprinkle the main ingredient- "LOVE" into all of the jars!
Who knows... maybe, after all, I still have some potential to one day be that grandma, who can be delegated handicraft tasks.
Anyway- just to end here on a fun note. Here's a picture of my "crazy creatures" who were some of the receivers of the goodies.


Hope this helps some of you guys.
Wishing you all an amazing Holiday season and beautiful time with your closest people.
Love,
Liisa.

popular posts


seen in media


blog archive
posts by category